¿Tiene duda en el tamaño?
Relax le ayudaremos!
* Medición referente al área máxima de lectura de su máquina de bordado y extensión utilizada.
** Revisar las medidas del diseño y si las mismas son soportadas en la altura y anchura máxima permitida para su modelo de máquina.
0

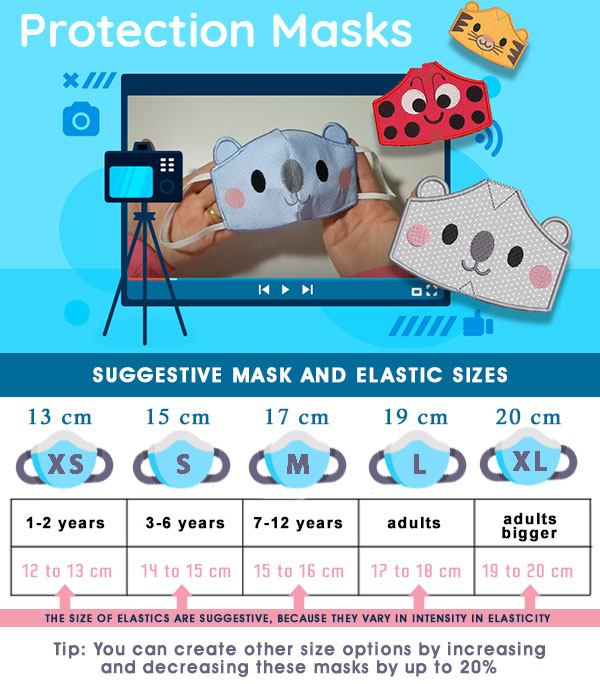
Learn in this video how to make beautiful protective masks on the embroidery machine!

Before you start, separate two rubber bands, their measurements vary according to age so consider that each rubber band must be 1 cm smaller than the size of the mask, see in the table above


  • 1º Attach only the stabilizer to the hoop and embroider the first color.
  • 2º Place the elastics at the marked points and embroider the 4 (colors) side brackets.
  • 3º Place the fabric over the stabilizer and embroider the colors until the central part is finished.
  • 4º Place a fabric under the hoop, if you prefer to pin it.
  • 5º Embroider the contour and remove the embroidery hoop to cut the leftover fabrics in front and back.
  • 6º Finalize the full stitch finish around the mask.
  • 7º Highlight the stabilizer mask, it is ready.
  • 8º In a straight sewing machine join the top and bottom creases and if you want a better finish on these parts, use the backing for the back of clothes that has a soft touch.

Buy Masks

Email

contato@clickborde.com.br

WhatsApp

55 11 4321-3531

Customer Service

Monday to Friday from 9:00 to 18:00

Notifications

Stay updated with the latest news